TERM 1
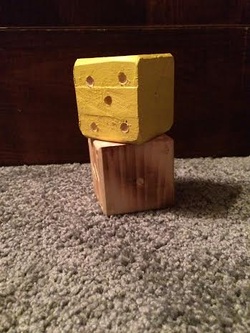
-This assignment was my first project in engineering design class. The project had students make a pair of dice out of wood.
-Before I started the project I had to research how big the dice were going to be and I also researched on my phone a picture of a dice so I could base my design off of an actual pair of dice.
-There were a few steps to complete this project. 1. Cut three square pieces of wood the same size. 2. Stack the three pieces of wood and glue them together to make a cube. 3. sand the edges of the wood to make rounded edges. 4. Drill holes into the wood making the numbers on the dice. 5 paint the dice or use the heat gun to make the dice look as if it is burned.
-The final output was 2 cubes that appeared to be a set of dice.
-The input I received while doing my project was how to sand the edges to make the dice look like an actual dice. I did not think to sand the edges until one of my class mates suggested I did so. Doing this it made the wood look like an actual dice.
-During this project I learned how to use the miter saw, the drill press, and the sander. I also learned how to make cubes by stacking pieces of wood.
- I could always use these skills in future projects if I ever need to cut wood or drill a hole in something. I could also use this skills outside of school if I ever need to cut wood for a project around the house.
- If I were to do this project again I would o the sanding in a better way so the edges were cleanly rounded to make it look more realistic.
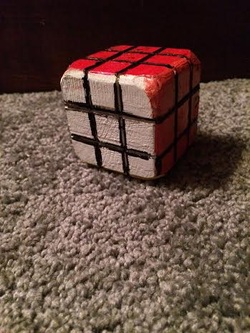
-This project was making a Rubik's cube the looked as realistic as possible using wood.
- Before I began this project I had to research how big a real Rubik's cube was and had to again find a picture of one to base my design off of it.
-The process to create this project was 1.cut three square pieces of wood the same size. 2. stack the pieces of wood on top of each other and glue them together. 3. cut ridges into the wood. 4. Sand the edges to make them rounded.5. paint each side of the cube a different color. 6.use a sharpie in the groves to create the lines.
-The final product was a realistic Rubik's cube.
-In this project I used the miter saw, sander, and the band saw. I also learned how to make groves in the wood without cutting all the way through the wood. And I learned how to make a design that is very realistic to a real object.
-The input I received from a class mate in this project was to use the band saw to create the groves on the cube. If I id not get this advice my cube would not look as realistic as it does.
-I could use the skills I know in projects in the future if we ever again have to make a realistic object.
-If I could do this project again I would try to paint a little better so the sides would not have mixed colors.
-
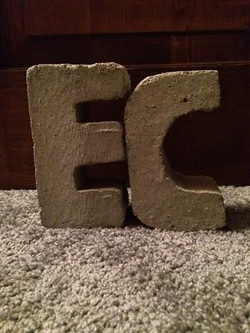
-This project was making ones initials out of concrete.
- Before starting the project I had t0 research how to make 3D letter on paper before I could translate it into concrete.
- The process to create this project was 1. draw the 3D letter and get them approved by Mr. Ramos. 2 cut out the letter from pink foam to make a template for the concrete. 3 glue the template on to another piece of pink foam for the bottom of the template. 4 using concrete mix and water make concrete and pour it into the mold. 5 remove all excess concrete and use a palm sander to get all bubble out. 6 let mold dry for 2 days then carefully remove the concrete from the mold.
- The final product was my own 3D initials made from concrete.
-This was my first project using concrete and the palm sander, as well as pink foam. I also learned how to make 3D images and how to make concrete.
- As I was making this project Mr. Ramos told me that I should smooth out the edges of my template. If i did not do this the edges of my concrete would be rough and uneven.
-I could use the skills that i learned if I ever need to fix anything with concrete such as pot holes in my drive way.
-If I could do this project again I would make the bottom of my C flatter so it could stand up on its own.
